
MLC-200
SETTING UP UNIQUE NETWORK ID(S)
MLA-200
Each
Step 1:
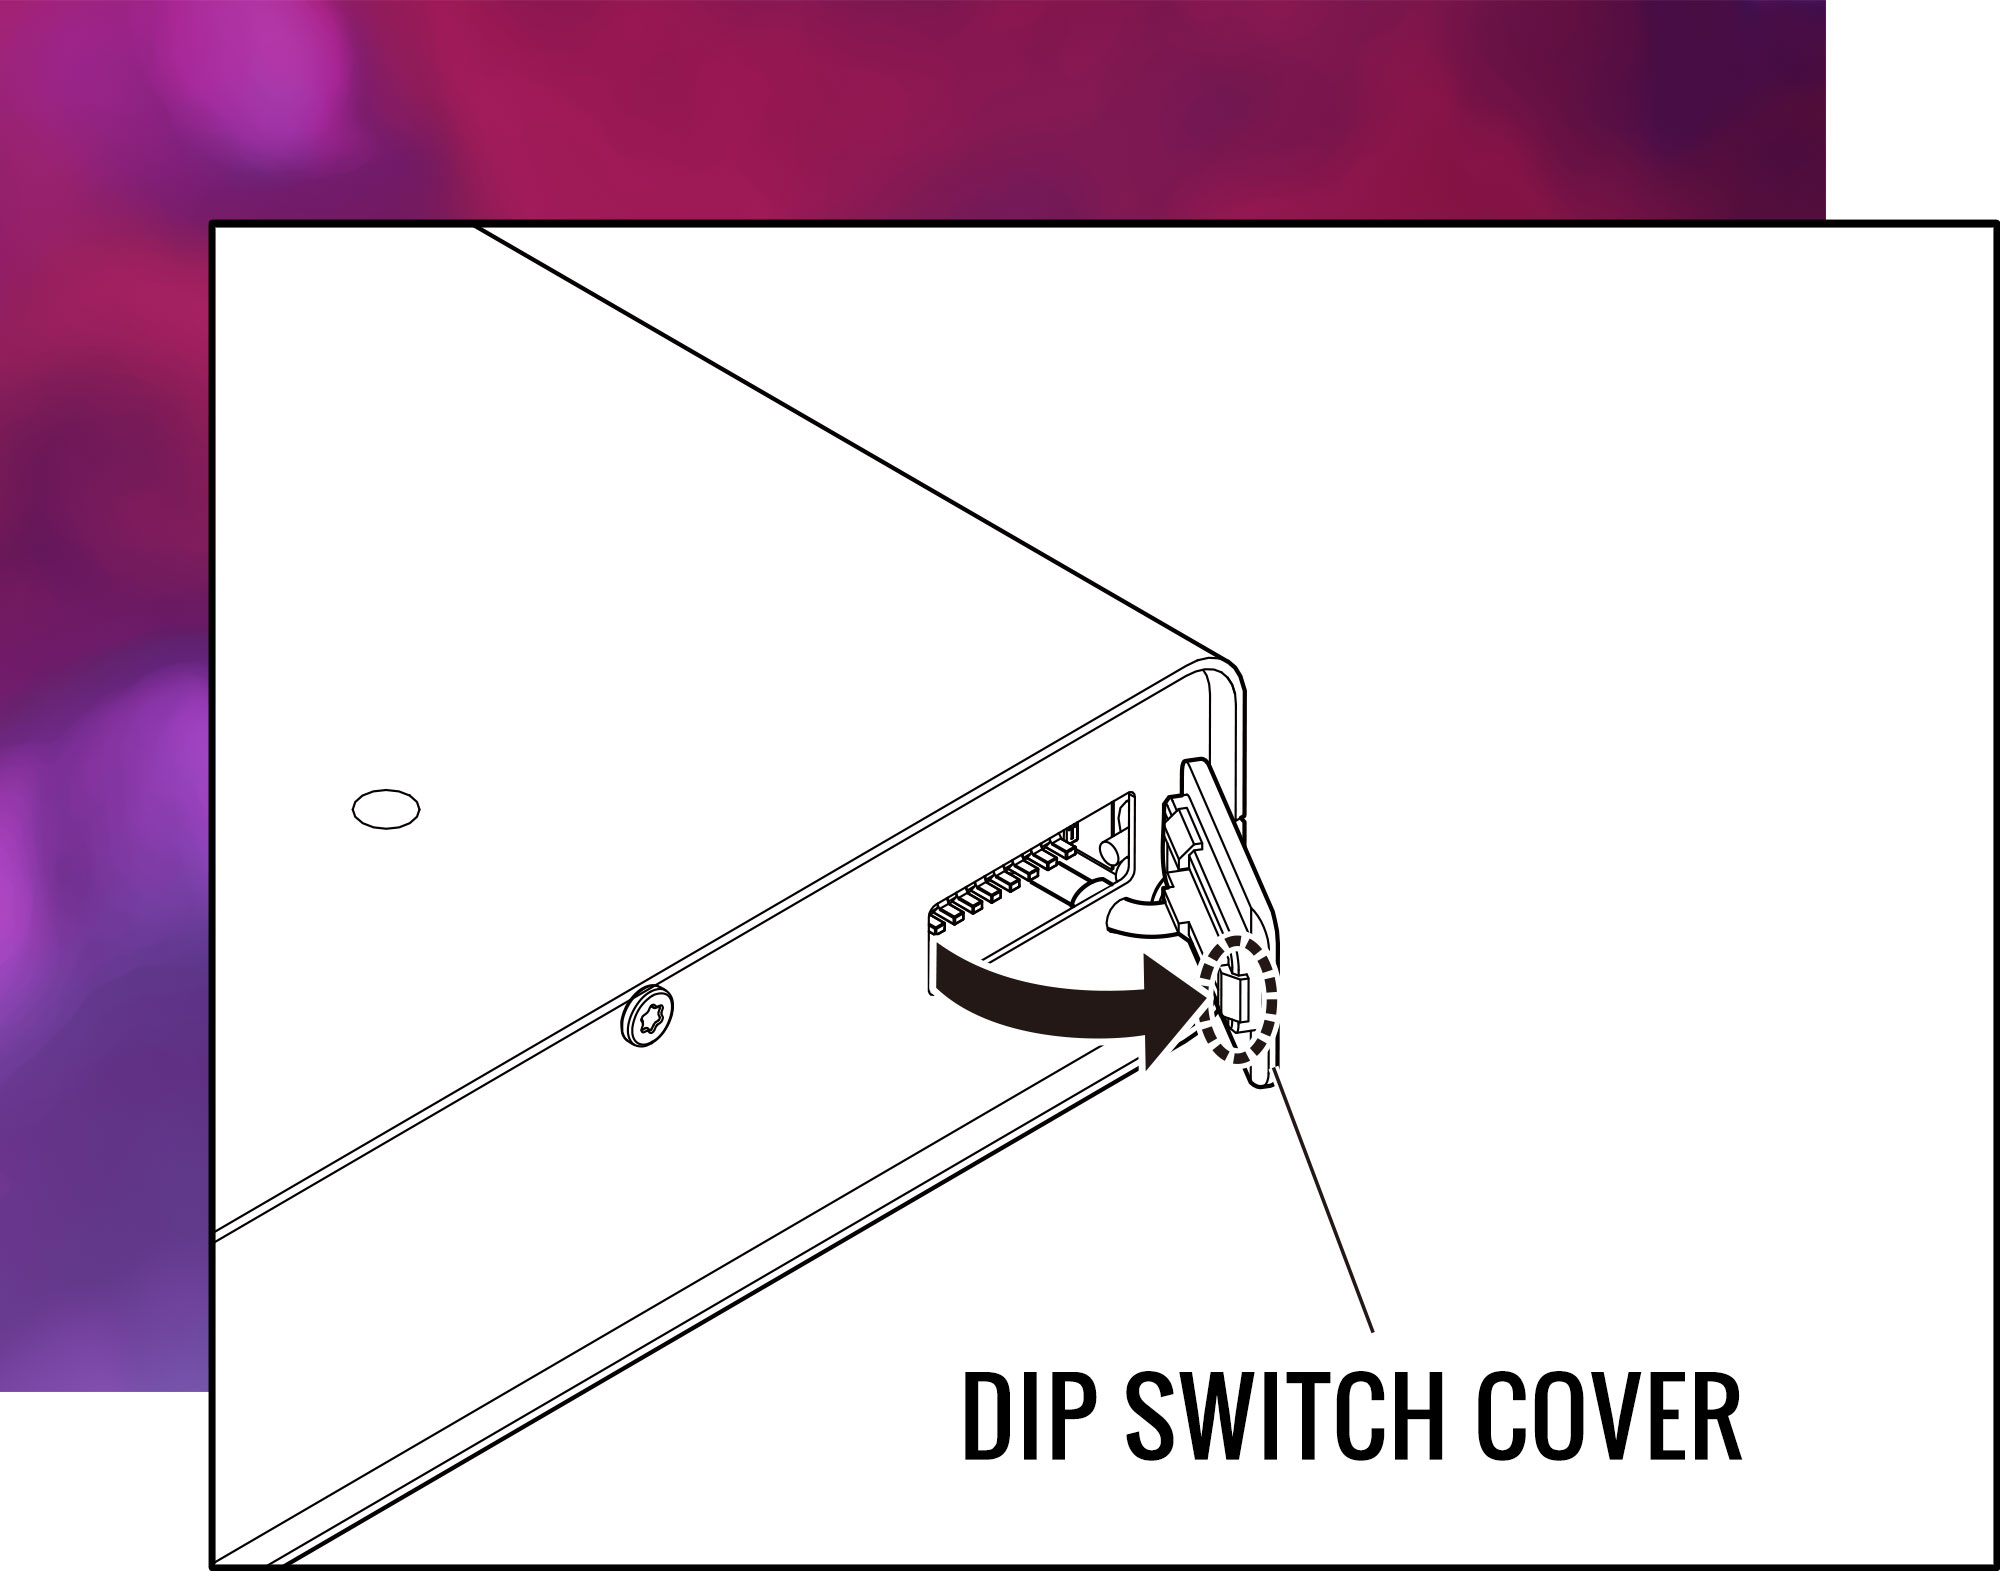
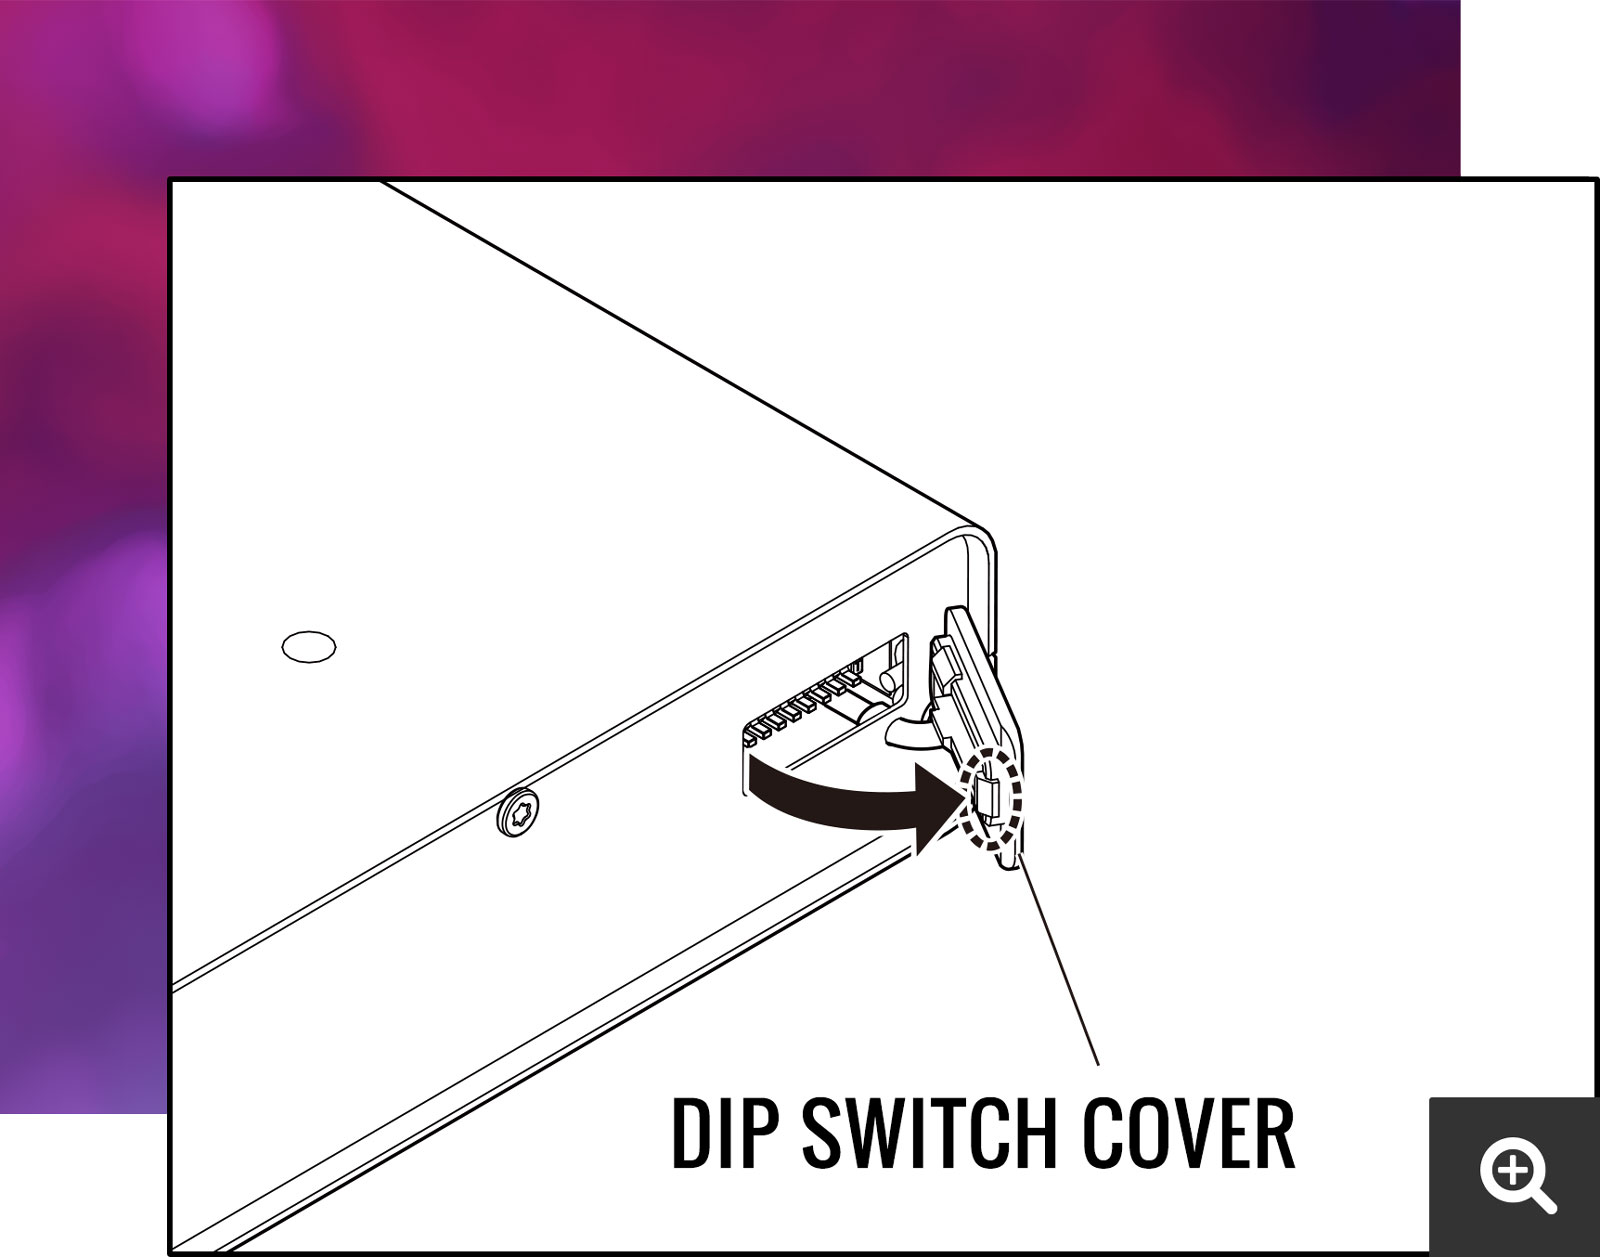
With nothing connected, open the DIP switch cover on the rear panel.
One side of the cover remains attached. Disengage the side that does not remain attached, and then slowly open the cover
Step 2:
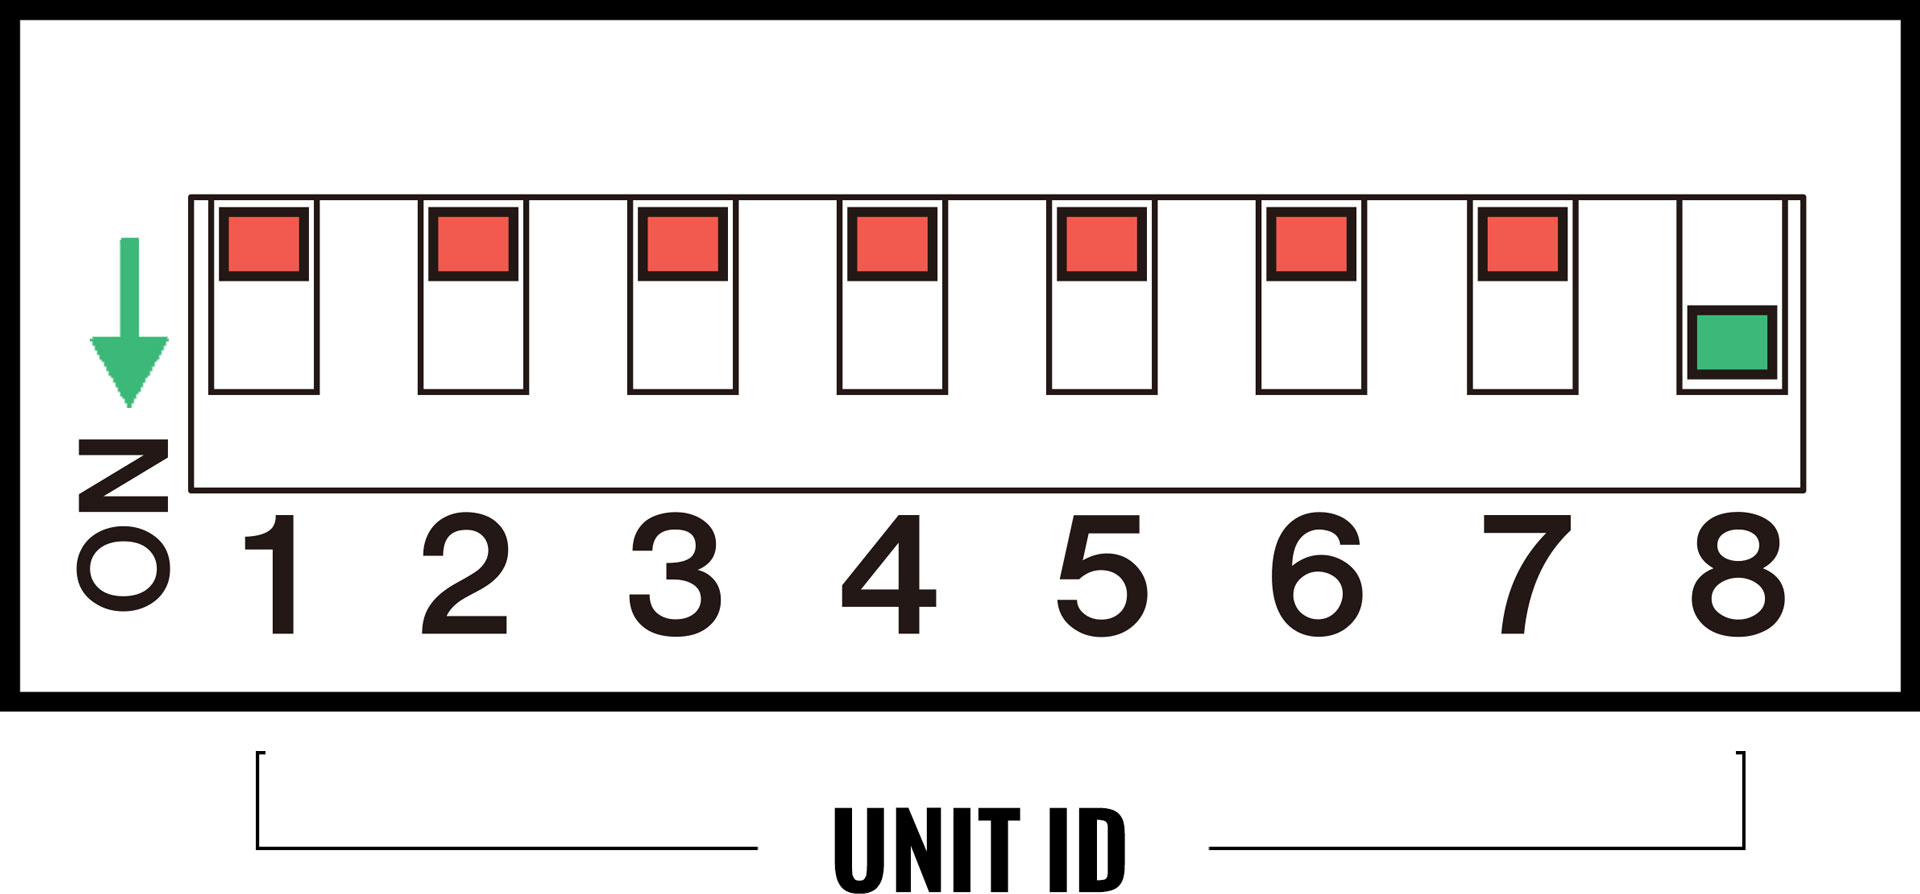
The switches of the DIP switch are set to ON when it is down and OFF when it is up. As a default, all switches are set to OFF (up).
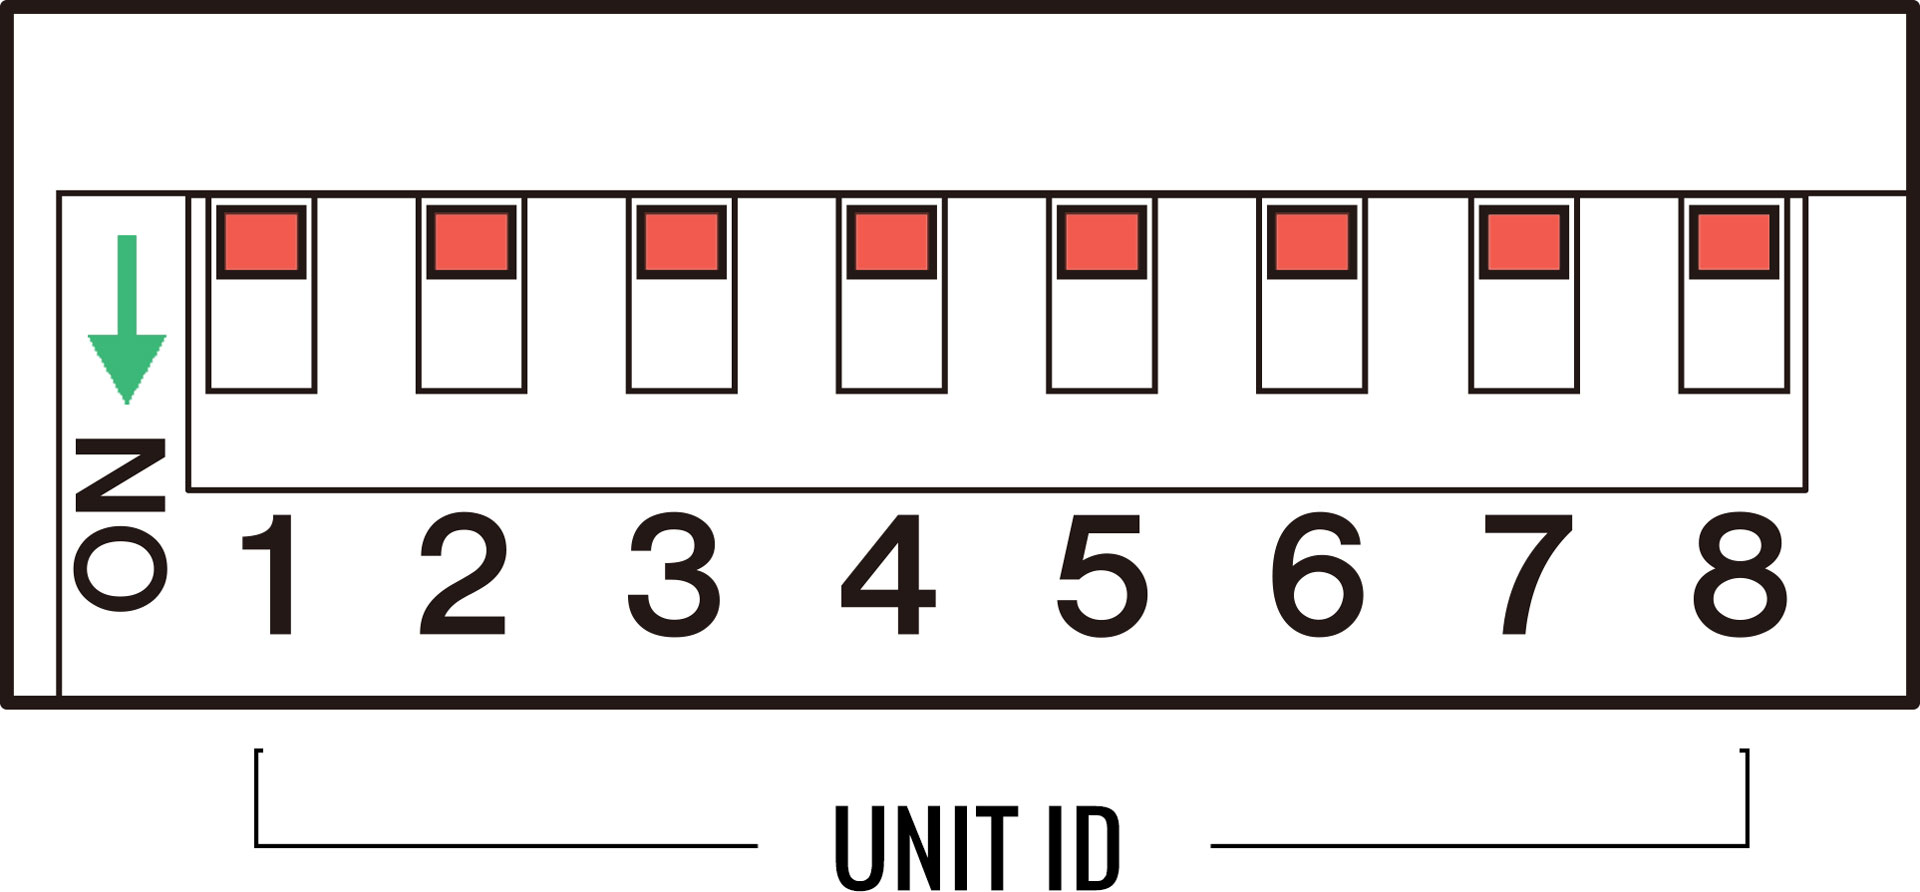
Be sure to view the DIP switch in its proper orientation.
Step 3:
Flip the instructor's unit on port 8
Step 4:
Each student's
For a full list of combinations please download the PDF document below:
STUDENT NUMBER SWITCH REFERENCE